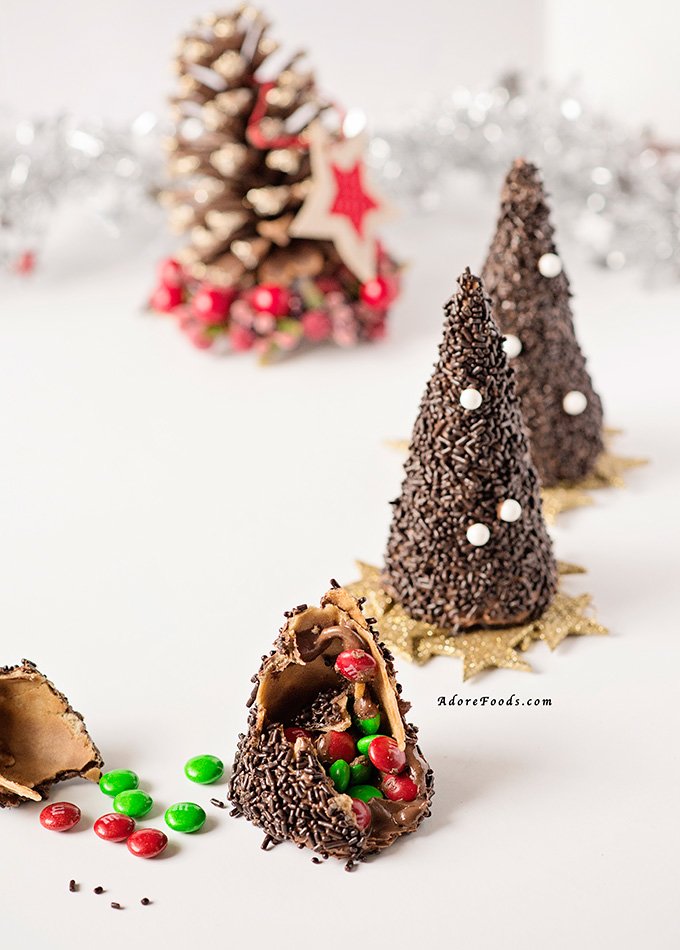
These Chocolate Christmas Tree Edible Piñatas are so much fun!…and delicious!


December is all about traditions in our family. Starting with the first day of the month, when we usually put out and decorate our Christmas tree to the last day of the year when…we have to smash a piñata 🙂 My daughter thinks this will release all the good things for the next year…aka sweets, mollies…just great surprises!
Over the years we had all types of pinatas. Bought from the shops stuffed with all the candies and chocolates you can think of, homemade ones in probably the strangest shapes ever but never edible ones.

This year we have decided to include more chocolate (if it’s possible ..:) ) and create Chocolate Christmas Tree pinatas. This way there will be no waste 🙂
What could be more fun than ice cream waffles dipped in chocolate, filled with all your favorite candies, covered in chocolate sprinkles? This delicious surprise treat is sooo great, for both kids and adults and so easy to make.

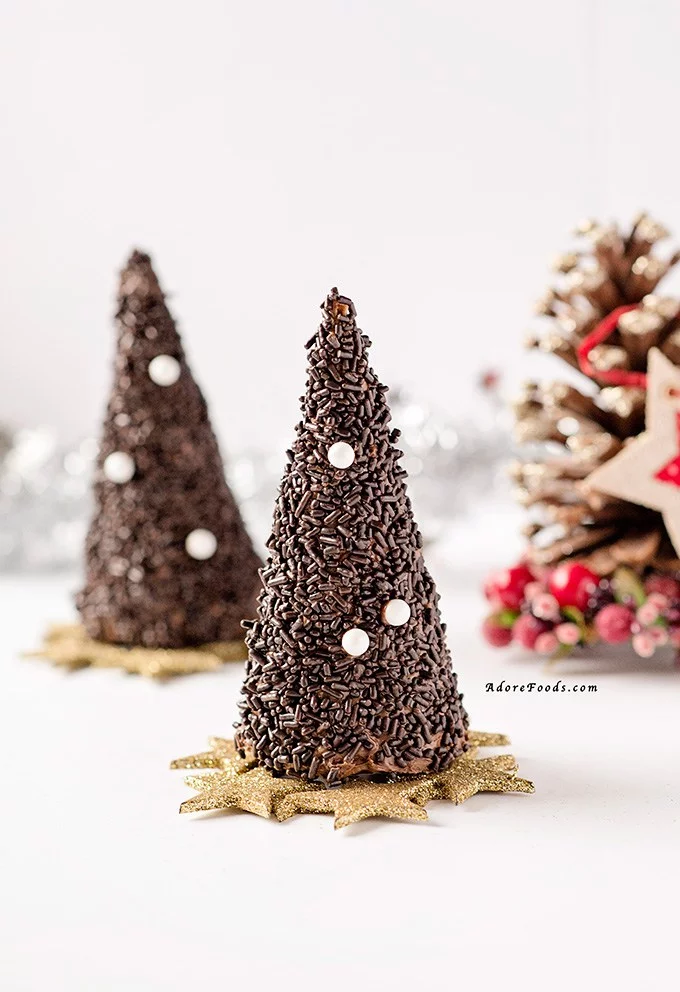
Surprise your guests this time of the year with these cute and delicious edible pints!
I am warning you. Be prepared for some serious fingers licking!
More Christmas Dessert Recipes to Try!
- Peppermint Meringue Cookies
- Peppermint Ice Cream with Candy cane
- Cranberry Bundt Cake
- Mini Panettone (traditional Italian dessert for Christmas)
- Danish Dream Cake (traditional Dutch Christmas dessert recipe)
- Best German Christmas Cookies
- Kifli Cookies (traditional Hungarian Christmas treats)
Chocolate Christmas Tree Edible Piñata

Ingredients
- 8 ice cream waffle cones
- 23 oz/ 650g chocolate morsels, milk, dark, white, etc
- 6 oz/ 175g chocolate sprinkles
- Sugar pearls
- Chocolates, candies ..
- 5 oz sugar pearls, white
Instructions
- Melt the chocolate morsels in a double boiler over low medium heat.
- First, will make the lids for the Christmas trees. On a baking paper, draw 8 circles a little bit larger than the opening of the waffle cones. Add melted chocolate to the drawn circles to create the lids. Allow them to become solid. Reserve left melted chocolate for later.
- Meanwhile, place the waffle cones upside down in a small cup and fill them with candies, lollies, etc.
- Using a brush, add some melted chocolate to the edges of the cones and cover with the chocolate lids you have made.
- Add more hot chocolate to the sides to cover well the sides and the lids and allow to become solid by placing them in the fridge for at least 15 minutes.
- Remove cones from the fridge, check if the base is solid and also check if melted chocolate is still liquid. Add chocolate sprinkled to a bowl. Using the brush, cover the exterior of the cones with melted chocolate. Place the cones one by one in the bowl and cover with chocolate sprinkles as much as you can, trying the cover most of the outside of the cones. Decorate with sugar pearls.
- Serve and have fun!
Nutrition Information:
Serving Size:
1 gramsAmount Per Serving: Unsaturated Fat: 0g
Jennifer A Stewart
Wednesday 30th of November 2016
These are so fun! Every year I make cake houses (I have a pan) and then decorate them with cone trees covered in frosting. It's like a village and you can eat them but they don't have a surprise inside like yours! I'm switching it up this year!